Thursday, July 12, 2012

Read a book: Done! (Part 1 of 2)

During college and almost all of grad school (a total of more than 10 years), I finished exactly two books: Freakonomics and Walter Cronkite's autobiography. (And then he died a week later at the age of 92.) 
It's not that I'm anti-reading... I generally read magazines cover-to-cover (including letters to the editor and the yearly sidebar that tells you the magazine's readership), and I keep up with a lot of blogs. There were a few books I started reading, but never finished, including Stephen Fry's autobiography. Based on my most previous experience with completing an autobiography, maybe it's a good thing for Stephen Fry's health that I never finished his book. For some reason, I used to find it hard to commit to reading a full-length book. Even if I did try to read, I felt that only non-fiction, where I might learn facts that are potentially useful for trivia night, was worthy of my time.

I kept up this avoidance of books all throughout grad school, until the very end. My lease was up, and I only needed two more months to finish my thesis, so instead of renewing my lease for another year, JM kindly let me crash at her apartment. It's important to note that aside from being a biology major in college, JM was also an English major, so she had hundreds of books along her shelves.
As everyone knows, when you have to do something that you don't want to do, you'll find anything else to do to procrastinate. (For example: http://imgur.com/2K1nO) The internet is an excellent vehicle for procrastination, but unfortunately, JM didn't have internet at her apartment. And her TV has no channels. And her apartment was clean enough. And her cat sleeps all day. I spent one afternoon arranging the plastic containers in her cupboard to make sure they all had matching lids. (But you can really only do that once.) I spent another afternoon organizing her receipts, bills, and letters from her grandfather. (And once they're in their separate boxes, you just keep following that system.) But I digress....

At one point, I was so bored of working that I picked up a short fictional book ("Eat When You Feel Sad") that one of JM's friends had lent her, and starting reading. The story and the style of writing was so strange that I kept reading just to get to the ending. I didn't like the book, but I finished it. When JM got home from lab, she was obviously disappointed that I didn't make progress with my writing, but at the same time a bit incredulous that I voluntarily finished an entire book.
From that day on, I would pull books from JM's shelf that seemed interesting:
You might notice that these are all non-fiction books. Shortly after finishing my thesis (which I did eventually finish despite discovering this new time-consuming hobby), I decided to give fiction a try and chose to start with the Harry Potter series. Enough of my friends were fans (Pottheads?) of the books and the movies, and they all seemed to be in the loop about Muggles, and the rules of Quidditch, and who killed Dumbledore. (Incidentally, I was of no help to my trivia team when we encountered a round based solely on Harry Potter.) My understanding of the stories was something like this.  My friend MU had all the books, so as I finished one book, he would supply the next. 
Before finishing off Harry Potter, I took a short hiatus to read the Hunger Games trilogy, provided by CB. I realized that this was the first time I read a book before the movie came out. (But I still cried like a baby when that girl died in the movie.)

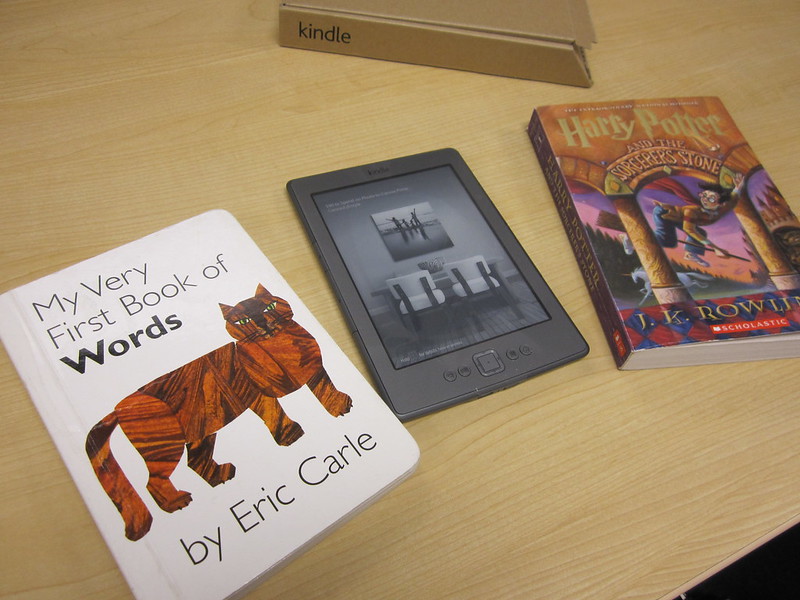
About two months ago, I bought myself a Kindle, on which I've read five books:
So in the span of less than a year, I've essentially converted from a non-reader to a legitimate Kindle toter. For all the readers and especially non-readers out there, ES shared this wonderful reading-related song with me several years ago. The language is NSFW, but it contains a lot of important life lessons. R-E-A-D a B-O-Ohhhkayyy!
-T

Read a book: Done! (Part 2 of 2)

The early Harry Potter books were only a couple hundred pages each, so I was able to stick them in my bag and read them while I waited for the shuttle. However, the later books were insanely thick, and I could no longer easily transport them. Eventually, I decided to get a Kindle.
Obviously, every Kindle needs its own case. I visited the Salvation Army and bought two books that might be able to fit the Kindle inside. Eric Carle's "My Very First Book of Words" would be the ironic option, and the Harry Potter book would have significance in that it got me into reading fiction. 

Based on my experience in cutting secret compartments into books (this would be my third), I ultimately decided on the Eric Carle book because it was a board book and would hold its structure more easily. I was in a bit of a rush at the time, so I used clear tape to temporarily hold it all together. I have since replaced all the visible tape with double-sided tape (which everyone should have... it's magical!). I also stuck magnets on each side of the case (right below the surface pages) to keep the book from drifting open.

Because the Kindle uses E-ink instead of an LCD screen, it minimizes glare, but is useless in the dark. I wanted to see if I could make a simple gadget to supply a light source. After a bit of finagling with basic supplies I had lying around, I came up with a design that uses a small binder clip, a medium binder clip, 2 LEDs, 1 cell battery, and a small strip of paper. The medium binder clip is used to attach the contraption to the custom Kindle case.

Surprisingly, binder clips conduct electricity decently well. I used one of the arms of the binder clip to be the on/off switch. In the first picture below, the arm pointing off to the left side of the picture leaves the circuit open, so the LEDs stay off. In the picture on the right, I have flipped the arm so that it rests on the battery, thus completing the circuit and turning the LEDs on.
 

Here is what it looks like in the dark.

Some people have asked what the point of all this is. Yes, I know there are all sorts of cases and lights made for the Kindle, but by ThaiBinh standards, that would just be too easy. There wouldn't be anything to blog about and share with all 1 of my followers.
-T

Wednesday, March 28, 2012

Donate (a full bag of) blood: Done!

Over the past 10 years, I have tried to donate blood 3 times, but failed each time.

  • In high school, I never got past the initial eligibility questionnaire.
  • In college, I got to the point where I had a needle in my arm and the blood was flowing into the bag... until it was about a third full. The person collecting my blood noticed that my blood flow was slowing down. They have a tool that looks like a dull pair of scissors that they clamp and glide over the tubing to clear away blood inside the tubing to determine how fast the blood is flowing. After a swift glide with those "scissors", it was apparent that my blood was moving at 0 mph. A supervisor was called over. Then a number of other phlebotomists took turns nudging and wiggling the needle in my arm, to no avail. So that was failure #2.  
  • In grad school, there was a Yale vs. Harvard blood drive, and I was determined to do better. I drank loads of water for days in advance. (I will spare you details of how awesomely clear my bodily fluids were.) I was excited and pumped up. My friend PS came to donate too. I was thinking, "Ima forreal donate blood this time, and we're going to beat Harvard in this competition!"
    This time, I got to the point where they stuck a needle was in my arm.
    And that was as far as I got. Again, a supervisor was called over. Then a number of other phlebotomists took turns nudging and wiggling the needle in my arm, to no avail. No blood ever even passed through the needle. The dull scissor thingy was never necessary, because the tubing was as clear and see-through as my bodily fluids. I felt really bad that I wasted an entire blood bag kit. So that was failure #3.
    But that's not the end of that story... A couple weeks later, I got an email:

    Hi Thaibinh,
    Thanks for donating blood at the Harvard-Yale Challenge! Just wanted to let you know that you've won an iPod shuffle!


    Apparently by signing up to donate blood, I was entered into a contest for an iPod shuffle. My friend PS (who had legitimately donated a full pint of blood) was not amused.

At this point, I had pretty much given up on ever donating blood and saving lives. However, an opportunity came up a few weeks ago when ES (a regular donor) was about to call the Red Cross to make an appointment for his bi-monthly donation. I happened to be there and decided on a whim to give it one last try.
In preparation, I again drank bottles and bottles of water like a boss. The eligibility questionnaire went without a hitch, and soon my arm was being cleaned with an iodine swab. A slight pinch later, my blood was flowing into a bag. I checked with my phlebotomist every couple minutes to make sure blood was still flowing, because I was still skeptical about my ability to fill an entire bag. In the meantime, ES had finished donating his pint and took a picture of me in action:
Thumbs up everybody!

Eventually, I passed the threshold and became an official (full bag of) blood donor!!

Afterwards, while eating snacks and drinking apple juice, ES and I had a conversation with one of the organizers of the blood drive. I was really surprised to learn that our blood would most likely be used within 3-4 days; I had donated late afternoon on a Monday, and by Tuesday morning, my blood would already be tested, and registered in the blood bank. By Thursday or Friday, it would be used up. I guess I should take this opportunity to encourage everybody (who is able) to donate blood. You can't possibly fail more times than I did.
When I returned home later that day, I found out that despite all my failed attempts at donating blood, I have an online account with the American Red Cross. Although I have supposedly donated 3 times (not counting my most recent success), I still don't know my blood type:


I've been told to expect my donor card in the mail in the next several weeks, and I'm excited to finally find out what blood type I am! I'll update this once I find out!
-T


[Edit:] I'm O+!


Wednesday, February 15, 2012

Make mittens: Done!

I had a nice red sweater, but there was a hole on the side that kept growing every time I wore it, and unless I decided to follow a drastic calorie-reducing diet, there was no realistic way I would ever fit into this sweater again. Luckily, I found this article online, and making mittens seemed like a perfect project for a sweater I didn't want to throw out.
The video tutorial suggested using fleece as the inner lining, but around the same time that I started planning this project, my flannel pajama pants ripped. Naturally, I decided to substitute my torn PJ pants for the fleece to line my mittens. (People have asked whether I grew up during the Depression, considering the amount of scrap materials I am so hesitant to throw out.)

The "before" picture.

The first step was to cut out the pattern. I realized that I didn't have any pins to hold the pattern in place. But... within arms reach, I had some LEDs from another project that I'm working on.
 

Then I realized that it's even easier to just use double-sided tape to hold the pattern in place:

Here are the all the pieces that I cut out:

I had just enough sweater material to make two sets of mittens. Here are the leftover scraps...

I had just enough left over to make Juju's superhero outfit...
Serious business-cat by day...
... Super J by night!


GZC kindly lent me her sewing machine, and after careful reading of the manual with JM, I was on my way to sewing like a pro! Keep in mind that I had never used a sewing machine before, and had no concept of a bobbin or a presser foot. The instruction manual proved to be effective even for complete beginners.
I didn't even pose for this picture... This was the level of intensity the entire time.

Going around curves was my main source of frustration, but after some helpful tips from CB, I was able to sew each mitten layer with increasing agility and confidence.

A mitten begins to take shape!

Before sewing the cuffs on (which would permanently finalize my mittens), I took them out for a "test drive". It turns out that flannel is miserable as a mitten liner; the material did nothing against the wind that day, and its thinness left a lot of empty space inside the red shell. I ultimately decided to buy some fleece to replace the flannel.
Here, you can see the outer shell, the gray fleece, and the cuff. After sewing the three layers together, I would flip the cuff to the outside.

Tada! The finished product!

I had a lot of gray fleece left over, so I made some formal attire for Super J:

Thanks again to GZC, JM, and CB for all their help!!
-T

Sunday, November 13, 2011

Be a wet lab scientist: Done!

People usually imagine a science lab to be full of bubbling flasks, petri dishes of bacteria, and lots of expensive, heavy machinery. My degree is in the sciences, but my lab looks like an ordinary office, complete with cubicles and personal computers. To differentiate, we call  the flask/petri dish/centrifuge lab a "wet lab", while my lab is a "dry lab".
I have a lot of wet lab friends, and would occasionally visit them in their natural settings. Last week, I decided to put on a pair of latex gloves and try my hand at some wet lab work. JM was my mentor/boss for the day.
Here I am with a pipette (also called a pipet, pipettor, pipetman, or chemical dropper according to wiki). Once you learn how to use a pipette, you are officially initiated to the wet lab club.

I found out that a lot of wet lab work is labeling lots and lots of samples. Here I am labeling Eppendorf tubes (1.5 mL plastic test tubes):

When I was young, I had numerous science kits, two of which included a monocular (one eyepiece) microscope. However, I never got to use a binocular microscope until I took a cancer course during my second year of grad school. That course included one lab session, in which my computational biology friends and I were so lost. Each group was given a diseased organ on a tray, and our task was to find the tumor.
I had no idea what a tumor looked like in real life. No one in my group did. Our group was assigned a heart. When the prof came over to check in on our progress, we pointed to what we thought might be a tumor. Apparently our conception of a tumor was actually just fat.
The conversation with the professor continued kind of like this:
Dr.: Where is the aorta?
Us: ... umm... ?? The term sounds familiar...
Dr.: Where is the left side of the heart?
Us: ... umm... ?? Both sides look the same...
Dr.: Which side is thicker and more muscular?
Us: ... umm... That side?
Dr.: No.
Us: Ah yes, ok. This side.
Dr.: So if this side is more muscular, what does that mean?
Us: ... ??? ...
He must have been wondering how these idiots were able to sneak into this class.

Going back to the binocular microscope... If you don't ever use them, then you think they're easy to use: just put one eye over each eyepiece. If you use them all the time, then you think they're easy to use: just put one eye over each eyepiece.
In actuality, using these microscopes is akin to riding a bike: If you already know how to ride a bike, you forget what it was like when your training wheels were removed and you wobbled around your driveway. If you're trying to get used to using a binocular microscope, it takes (for me, anyway) a lot of adjusting. I don't quite know how the optics work, but somehow I ended up seeing my eyelashes flash across my line of vision whenever I blinked. Or I would see cells in one eye, but not the other. Then vice versa.
I now know my pupillary distance is 57.

Once you get the hang of it, you see incredible images. It's amazing to think about what you're seeing. I was like, "Wow... science... is sooo cool!"
JM gave me some interesting samples to look at and compare. I was able to take pictures of what I saw by putting my camera lens over one of the eyepieces. On the left, you see normal cells. On the right are the same line of cells, but because they are sensitive to a particular drug, they look dead/dying/shriveled up after being exposed to that drug. (You can click on them to enlarge the pictures.)
 

Sooo cool, right?!?
It was a pretty eventful day in lab for me: Pipetting, labeling, and microscoping.

Writing this post reminded me of a Research-in-progress (RIP) talk I gave in 2008. Although I was in the computational biology program, my lab advisor is in the pathology department, so my RIP talk was in front of predominantly wet lab biologists. To close my talk (and this post), I pointed out some differences between the wet lab and the dry lab.


-T

Monday, October 31, 2011

Make candy corn: Done!

Happy Halloween folks! This task wasn't actually on my list of things to do, but I saw an article in Lifehacker last week that showed how to make candy corn. I have no kitchen skills at all, but this seemed so intriguing.
Here are the ingredients I used:


In the bowl:
  • 2 1/2 cups confectioners' sugar
  • 1/4 cup dry powdered milk
  • 1/4 teaspoon salt
In the pot:
  • 1 cup sugar
  • 2/3 cup corn syrup
  • 1/3 cup unsalted butter (or use salted butter and don't ad the 1/4 teaspoon of salt)
On the side:
  • 1 teaspoon vanilla extract
  • Red and yellow food coloring (3 yellow drops for yellow; 2 yellow + 1 red for orange)
For some reason, I always think sifting flour/powdered sugar is for sissies, and so I severely underrate the value of sifting. And I always pay for this later. The problem is that I don't cook/bake often enough, so I always forget how much of a hassle it is to fix later. I apologize to the friends who found little lumps of powdered sugar in their candy.

I also undervalue candy thermometers. I've read that you can't make candy without a candy thermometer, and I have no idea why I keep thinking that I can be the first non-expert candy maker to defy that rule. (Other über-failed candy attempt: marshmallows.)
Reading the comments from another candy corn recipe, it seemed as though it was harder to fix overdone candy rather than underdone candy, so I erred on the side of lower heat. The comments also provided a link to a Washington Post article that contained temperatures, so I'm bookmarking it here for future reference.

More about the process... Once I had 3 bowls of the taffy-like candy, I rolled out ropes of each color across a cookie sheet and then flattened it. This rolling-out step took way longer than expected, so the softness of the candy was actually advantageous in this case.
Looks like bacon!


Finally, I cut each strip into the familiar triangles.


If I make this again, here are the things I would do differently:

  • Sift the confectioners' sugar
  • Ask friends if they have any powdered milk rather than buy a ginormous box
  • Use a candy thermometer
  • Make thicker ropes of candy. Once I have a triplet of ropes, I can then squeeze them and make the whole thing thinner.

-T

Tuesday, October 25, 2011

Start a blog called "The Poll Vault": Done!

Whenever I organize an event, I create a Google Form. Whenever I create a Google Form, I come up with a random, multiple choice question. I think I started asking these questions several years ago because 1) I love data, and 2) I'm always interested to see what defines "normal". I know for sure that the combination of growing up with immigrant parents mixed with my own eccentric peculiarities produces skewed views of "normal". When I observe something that doesn't mesh with what I previously thought were absolute truths, I start to wonder, 'Is it the other person, or is it me? There exist people who don't think the best part of a lobster is the tail?? Am I the weird one for assuming that the tail is by default the most desired part?'

I decided a couple years ago that I would one day compile all the results of these polls into a blog called "The Poll Vault". I thought it was pretty clever. I'm going to ignore the fact that googling that phrase shows that ABC News, The Washington Post, Extra (omgzz! totally newsworthy! "Blake Lively and Ryan Reynolds: PDA on Set of 'R.I.P.D.'") all independently came up with that pun.

Just wrote my first post yesterday: http://thepollvault.blogspot.com


graph of pole vault Olympic records
(Graph from http://motivate.maths.org/content/pole-vault)